Gluten Free Baking
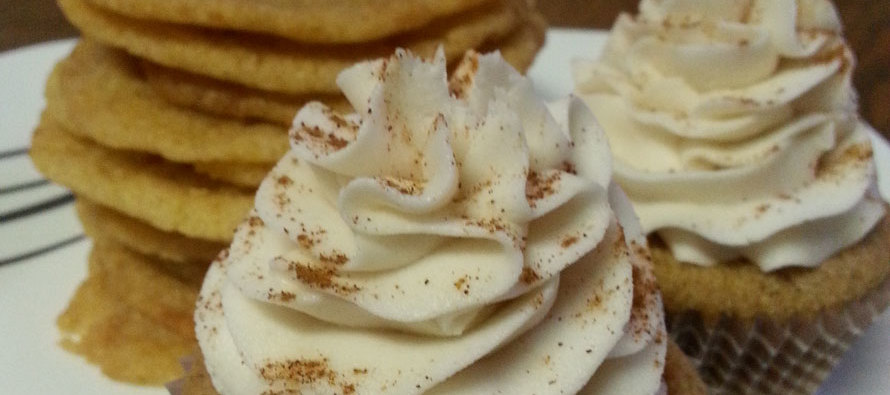
Last August, there was some exciting news for the gluten free world. The FDA defined what “gluten free” labeling means for food products, acknowledging that there must be set regulations for food companies to follow in order to label their products as gluten free. With this exciting development, what better time to talk about how to take your grandma’s best cake or cookie recipe and make it gluten free for all to enjoy?
Making baked goods gluten free can seem like a daunting task, and that’s probably one of the main reasons why people head to a gluten free bakery to indulge in these products, that have been professionally made, instead. But there is no harm in giving this challenge a go, right? There are pre-made gluten free all-purpose flour blends sold at many well-stocked grocery stores. However, where is the fun in using these when you can make your own blend? In mixing your own flour blend, you can add interesting flavors and create unique mixtures ideal for different types of treats. I have been experimenting with many of these flours in an attempt to take my tasty baked treats and make them gluten-free, while still keeping the integrity of my original recipe. I have definitely had some failed trials, but they were great learning experiences. I really want to improve my baking skills and I’ve still got a long way to go. I’ve been looking on websites like FBOI to learn about the different types of baking classes available and I’ve already seen a few that look good. Gluten free baking can be difficult if you don’t have the right knowledge to back up what you’re doing. The following are some excellent ingredients that I have found in doing my baking research.
First up, the lighter density flours, which provide a good base for a flour mixture. With any of these you can substitute 30-40% of a total flour mixture. I usually like to use two of these in my blend, making up a total of 60-80% of my flour mixture.
One of my favorites to work with is white rice flour, which has a nice light flavor to it. Don’t confuse this with brown rice flour, as this one behaves quite differently. Brown rice flour is higher in nutrients, but it gives a much grittier texture, so this doesn’t work for just any baked treat. I recommend using this one in your denser baked goods, such as breads or maybe breakfast cookies.
Quinoa flour is another versatile, light flour to work with. This guy is high in fiber, protein and vitamins, but still gives a great, light texture. However, using too much can add a slightly bitter flavor. An alternative to quinoa is millet flour, which is cheaper. This one is high and fiber and protein too, but not quite as bitter as quinoa flour.
Next up, the higher density flours, which help add structure to your baked goods. You wouldn’t want to use too much of these or your treats will come out very dense and dry. It is important that there is at least an equal amount of liquid to help balance out these flours. With these flours, I recommend substituting no more than 20% of your total flour mixture.
Coconut flour is a delicious, high fiber flour and a favorite of mine. It has a wonderful sweet flavor. However, that flavor will come across in your final product, so be mindful of the flavors you are using and make sure they will pair well with coconut. If coconut doesn’t work for you, corn flour is a good alternative. Corn flour has a more subtle sweetness to it, without adding too much flavor. Oat flour is another dense flour that can be used in baking. This one doesn’t add too much flavor to your baked goods as it doesn’t have as much sweetness to it.
Finally, we have the binders. Gluten serves as a binder in baking. So in gluten free baking it is important to have one or two of these added to your baked treats if you don’t want them to crumble apart on you. Especially if you are baking vegan treats, and therefore not using eggs. These ingredients all vary in amounts to use in your recipes. With these ingredients, you should add them in the creaming stage of your recipe, before adding flours.
Xanthan gum is a thickener and stabilizer, serving as a great gluten replacement. It is quite pricey, but you don’t have to use too much in your baked goods, only ¼-1 teaspoon per cup of flour, depending on what you are making. Bob’s Red Mill brand provides a handy little chart right on the bag telling you how much to use for each type of treat.
Tapioca flour is another great binder you can use and has a slightly sweet flavor to it. This one requires a little bit more to be added to your recipe, about 2-4 tablespoons per cup of flour. Ground flax seed is a high fiber ingredient that works well in gluten free baking. This serves as more of an egg substitute (visit Linda’s Yummies to learn more about this). Keep in mind you will see the little flecks of flax seed in your final product.
One final note I want to leave you is to always be sure to mix these very well. You want to make sure all the different flours are well incorporated throughout your batter or dough. You don’t have to worry about over mixing since there is no gluten.
Remember, with baking; practice makes perfect! Especially with more difficult bakes, such as gluten free ones. So don’t be upset if something goes wrong the first time around, just learn from it and try again. If you feel you need some help, you could always look for something like these bakery classes in delhi. Classes such as these are a great way to learn more about baking and improve your bakes.
Though these are not the only flours out there, I have found that these work best for me, and hopefully for you too. I absolutely encourage trying new things, and if you find a unique flour at the grocery store, pick it up and try it out. That’s how we learn more about the baking world. Happy baking!

Linda Lichtenwalter-Evans
Linda Lichtenwalter-Evans is a baker and bartender in the wonderful city of Omaha. She spends her days baking delicious vegan and gluten-free treats and her evenings creating unique cocktails. In her free time, she enjoys comic books, sci-fi and horror movies, and a little Mario Kart. In short, this nerd enjoys getting people fat and drunk.
Related Articles
Calculated Cuisine
I’m a 24-year-old writer, not trained as a culinary chef. I’ve had experience as a server in the food industry
A Sandwich Called Reuben
Is there anything as soul satisfying as a perfectly made Reuben? Encountering your first Reuben is a delicious rite of
Supper Club: Benson Progressive Dinner
Publisher’s Note: Omega Omega Omega (Tri Omega), the culinary fraternity at the Institute for the Culinary Arts at Metropolitan Community
No comments
Write a commentOnly registered users can comment.
